 Business Insider recently published an article, which you can read here, which claims to give you 11 basic Excel tricks which will change your life – I have to disagree on some of them – here’s each of the tips they gave, and what we think they should have told you about.
Excel Trick 1) Jump from worksheet to worksheet with Ctrl + PgDn and Ctrl + PgUp

Excel Trick 2) Jump to the end of a data range or the next data range with Ctrl + Arrow
Excel Trick 3) Add the Shift key to select data
Ok – this is ok when you want to select stuff that’s all grouped together – what say you need to select several cells that are not side by side? Use the CTRL key instead – simply press the CTRL key and click on the cells you want to select:

Excel Trick 4) Double click to copy down
This is a cool trick, so cool we created a cheet card for you:

Excel Trick 5: Use shortcuts to quickly format values
Yes – ok – good tips here – but do you know some really basic ones you are more likely to use more often? Like CTRL + B for making your text BOLD and CTRL + I for italics? Or maybe not a commonly used, but still worth a mention – CTRL + U for underline
Excel Trick 6: Lock cells with F4
I don’t call this a trick – I call it vital basic knowledge if you are gonig to use Excel – it’s like knowing about the difference between Reverse and Drive. But – we explain it much better than they do in our blog post here – it’s actually an Infographic, which everyone likes:
[Excel Infographic] Understanding Absolute & Relative Addresses in
Excel – thisisIT Blog
Excel Trick 7: Summarize data with CountIF and SumIF
Why why why? Who would use CountIF and SumIF formulas when you can use PivotTables and get way more indepth summaries? I can’t explain it in this blog post – there’s a bit to learn before you can use them, but once you know how to use a PivotTable, you will beat anyone using CountIF and SumIF both time-wise and your boss will be left stary eyed when he see’s the detail of the analysis you can do with a PivotTable.
Excel Trick 8: Pull out the exact data you want with VLOOKUP
Nothing to add on this trick – it’s very useful and I use it a lot.
Excel Trick 9: Use & to combine text strings
Again, I’m thinking how often do people actually need to combine text strings? People have a much greater need to know how to break up text strings – especially anyone working with downloaded information such as bank statements, reports from accounting systems, exported csv databases etc. To break up a text string, you use Text to Columns:  So if you have a string of text in a cell, which really should be broken up into columns, click this button and follow through the steps. The most likely option you will use is the “Delimited” option, which means you specify a character in your text string which indicates where the text needs to be broken up – for example if you have a comma which indicates where the string needs to be broken up, then you specify that as the delimiting character and then click the Finish button. But you can use this for a lot of things – for example, you can break up full names so the first name and last name are in a column of their own – the delimiting character in that case would be a space – which is the space between the two names.
Excel Trick 10: Clean up text with LEFT, RIGHT and LEN
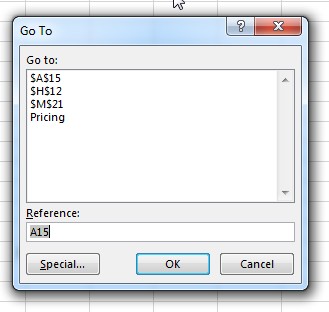
Ok – not always, but the trick I’m going to give you now is faster. In the example, they show how to use the Left formula to show just the abbreviation for the state name – you can do this without a formula, like this: Select the column that contains the state names, and press the CTRL and H keys together – the Find and Replace tool should open. In the FIND WHAT box, type in -* and leave the REPLACE WITH box blank. Now press the REPLACE ALL button. Bingo. By using -* in the Replace tool you are saying, everything after the -. It works the other way as well – if we used *-, it would delete everything BEFORE the -, leaving us just the names, without the abbreviations. You can use this in many ways and for many things. 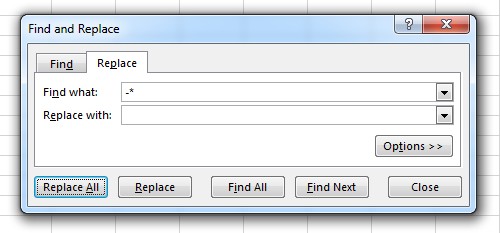
Excel Trick 11: Generate random values with RAND
This truely is random! Can’t see how this will change your life. How about we try again. What about this one instead:
Quickly insert a total sum in Excel – thisisIT Blog
But if you insist on the Random tip – why not use to RANDBETWEEN instead – that gives you a random number within a range you specify – here is an example of the formula: =RANDBETWEEN(100, 500).
Thats all from us today, I hope you enjoyed our improvements on the Business Insider article – all these tips above come from years of experience knowing what Excel users actually need help on – mainly through our interactions with users on our helpdesk.


